


What Are the Four Stages of the Injection Molding Cycle?
Slow cycle times and warped parts can ruin your production schedules and eat your profits. Understanding the four stages of the injection molding cycle helps you fix these issues.
The four stages of the injection molding cycle are clamping, injection, cooling, and ejection. This repeating process melts plastic, injects it into a mold under high pressure, cools it until it solidifies, and pushes the finished part out to start the cycle again.
Over my years of working with mold designs at KENVOX, I have seen many engineers struggle with cycle efficiency. If you want to stop wasting time and money on your production line, you need to look closer at how these steps connect. Let us dive into the details.
Is the Cooling Stage Really the Most Time-Consuming Bottleneck in the Injection Molding Cycle?
Long cycle times delay your product launches and raise costs. You might blame the molding machine, but the real bottleneck is usually heat. Better cooling design is the cure.
Yes, the cooling stage is the most time-consuming part, often taking up to 70% to 80% of the total cycle time. Optimizing mold cooling channel design and using proper thermal materials are key to reducing this bottleneck.
In my experience at KENVOX, many clients focus only on how fast they can inject plastic. They ignore the cooling stage. This is a big mistake. If you open the mold too early, the part will warp. If you wait too long, you waste money.
Rethinking Cooling Design
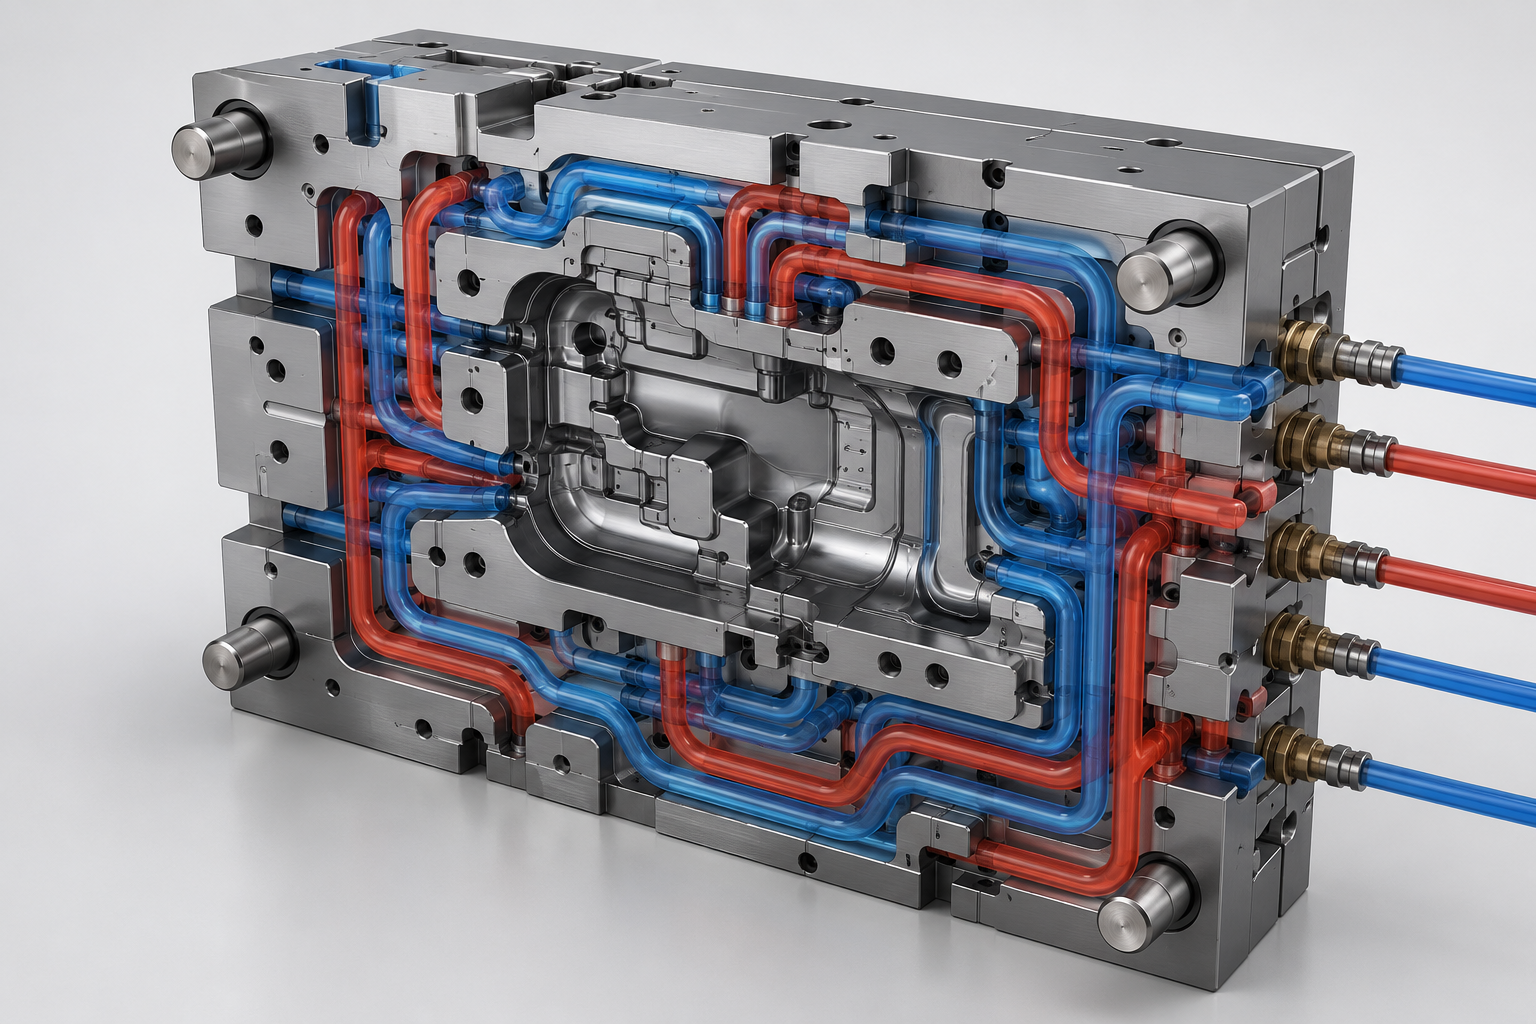
We need to use a problem-oriented approach. Do not just accept slow cycles. Instead, ask why heat is trapped. Traditional straight cooling channels often leave hot spots in deep corners. Conformal cooling channels, made with 3D printing, follow the shape of the part. They cool the mold evenly and quickly.
Moldflow and Smart Simulation
By using Moldflow software, we can simulate the heat transfer before we cut any metal. This saves time and prevents costly mistakes.
Here is a simple comparison of cooling methods:
| Cooling Method | Cooling Efficiency | Tooling Cost | Ideal Application |
|---|---|---|---|
| Conventional Drill | Medium to Low | Low | Simple, flat parts |
| Baffles and Bubblers | Medium | Medium | Deep cores or cavities |
| Conformal Cooling | High | High | Complex shapes, tight tolerances |
Using simulation tools helps us find the sweet spot between mold cost and cycle time. If you design the cooling channels right, you can cut your total cycle time by 20% to 40%. This change directly lowers your energy use and production costs.
How Does Parameter Control in the Injection Stage Directly Determine the Final Quality and Performance of Plastic Parts?
Hidden defects like flash, short shots, and weak weld lines can ruin your custom plastic parts. These issues stem from bad injection settings. Setting these parameters right solves the problem.
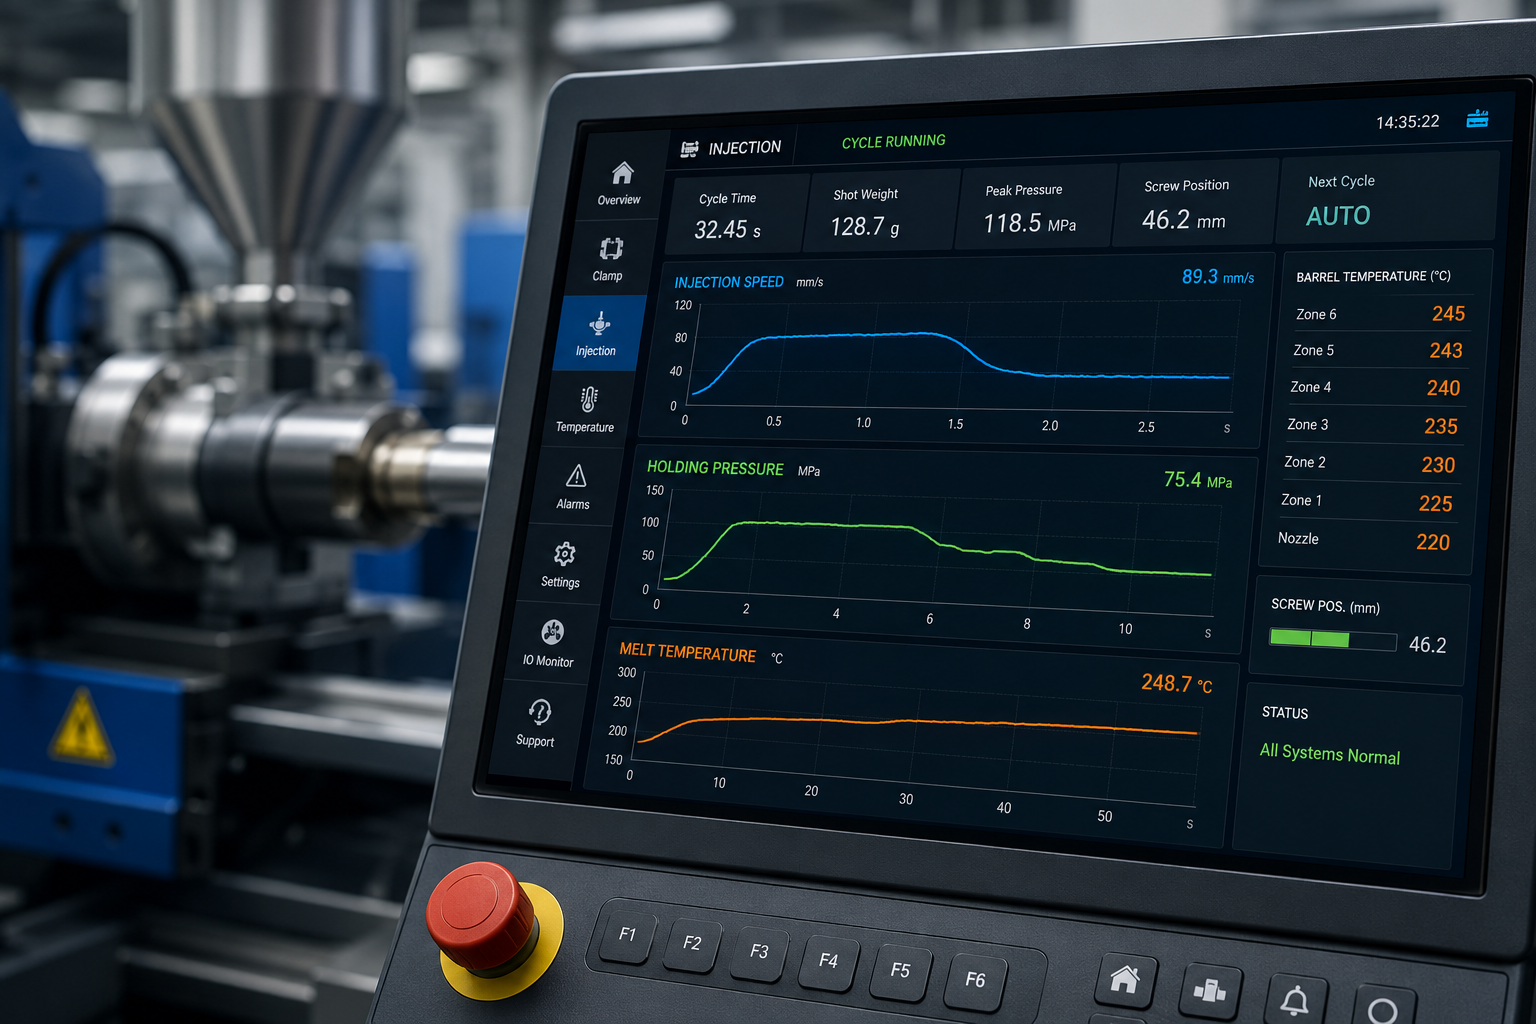
Injection parameters like speed, pressure, and melt temperature directly control mold filling. Keeping these inputs stable prevents common molding defects like short shots, flash, air traps, and weak weld lines, which ensures good part strength and appearance.
The injection stage is short but highly critical. It takes only a few seconds, but everything happens here. At KENVOX, we see many designers make parts with thin walls. These parts require high injection speeds and high pressures. If you do not control these settings, the plastic can degrade or fail to fill the mold.
The V-P Switchover Point
The most important setting is the transition from speed control to pressure control. This is the V-P switchover. If you switch too early, you get a short shot. If you switch too late, you overpack the mold, causing flash and high internal stress.
Balancing Key Parameters
You must balance melt temperature, injection speed, and holding pressure. Here is how they impact your final product quality:
| Injection Parameter | Main Goal | Risk of High Setting | Risk of Low Setting |
|---|---|---|---|
| Melt Temperature | Low viscosity | Material burning, degradation | Short shots, weak weld lines |
| Injection Speed | Rapid fill | Flash, jetting, burn marks | Hesitation, cold joints |
| Holding Pressure | Pack plastic | Part sticking, high stress | Shrinkage, sink marks, voids |
To solve these issues, we run Moldflow studies at the start of every project. This helps us find the best injection parameters before we start production. Systematically checking these inputs prevents defects and ensures stable part quality.
Do Clamping Force and Ejection System Design Significantly Affect Mold Life and Production Efficiency?
Mold wear and broken ejector pins can stop your production line instantly. Ignoring mechanical stresses ruins your tooling and halts your shipping. Proper mechanical design prevents these failures.
Yes, correct clamping force protects mold plates from bending and flashing, while a well-designed ejection system prevents part damage and sticky pins. Together, they directly increase mold life and keep your production running smoothly without unexpected shutdowns.
Many factories focus only on the plastic itself. They forget that the mold is a machine under high stress. If you apply too much clamping force, you will crush the mold vents and wear out the parting line. If you apply too little, the high injection pressure will push the mold open and cause flash.
Designing Better Ejection Systems
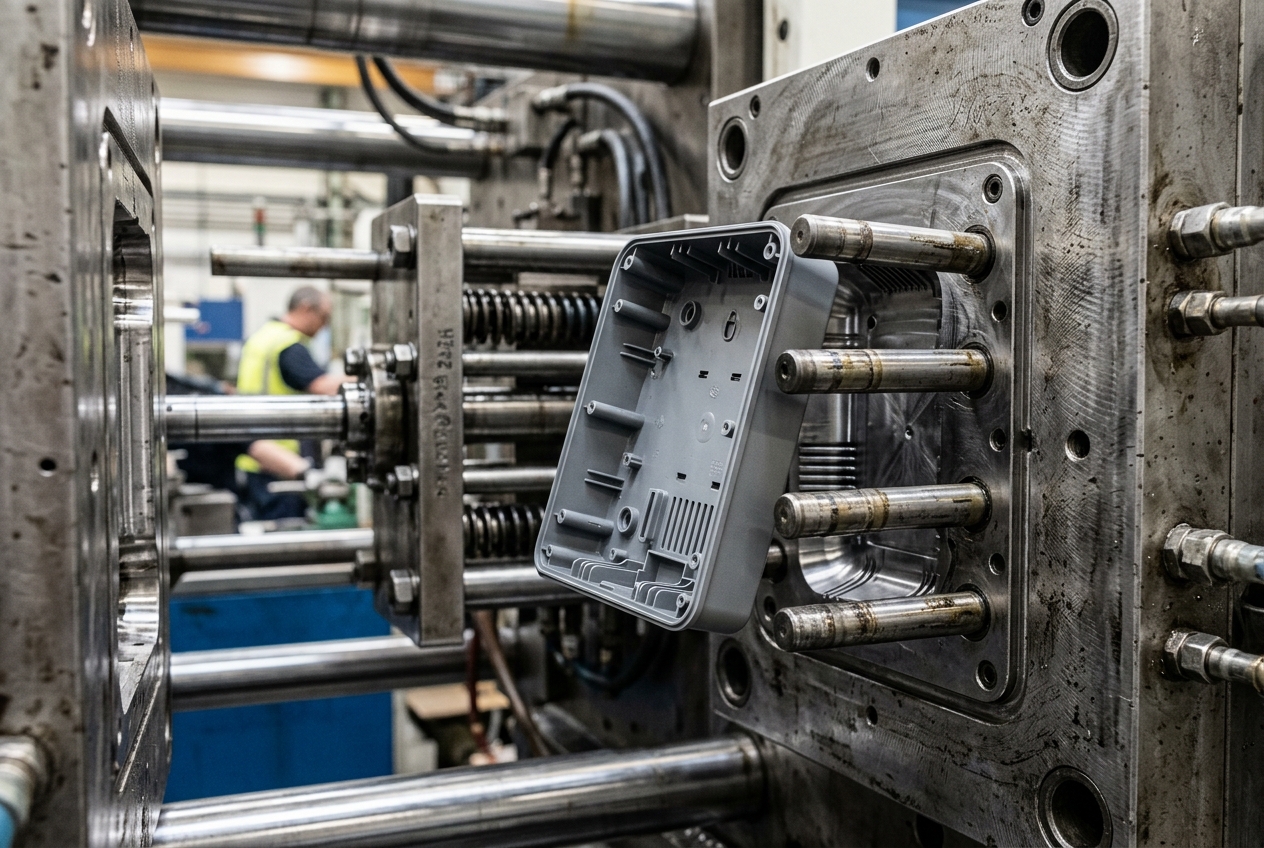
The ejection stage is the final step, but it can easily ruin your parts. If the ejector pins are too small or placed in the wrong spots, they will push through the warm plastic or leave marks on the surface.
We must design the ejection system based on the shape of the part. For example, deep ribs need blade ejectors, while round parts might need stripper rings.
Balancing Machine Forces
Here is how clamping and ejection forces affect your tools:
| System | Design Focus | Impact of Excess Force | Impact of Insufficient Force |
|---|---|---|---|
| Clamping | Hydraulic pressure | Vent damage, platens bending | Flash, dimensional changes |
| Ejection | Pin placement | Part deformation, stress marks | Part sticking, cycle delays |
At KENVOX, our team of engineers designs molds to balance these mechanical forces. By using strong mold bases and calculating the exact forces needed, we extend mold life and keep your cycle times fast.
Conclusion
Mastering the four injection molding stages through smart cooling, precise injection parameters, and robust mold designs will lower your costs, reduce energy use, and improve overall part quality.